Windows Server Backup is used to protect your operating system, system state, volumes, files, and application data. Backups can be saved to single or multiple disks, single or multiple volumes, DVDs, removable media, and even it can be saved in remote shared folders. Backup can be scheduled or it can run Manually. Windows Server 2016 Backup Solutions are divided into two types of Backups:
- Schedule Backup
- Once Backup
Both of them can be Performed in Full Server Backup and a custom Backup. Mostly Organizations they are using the Schedule Backup, and they will set the timing to the end of the day when the crews are leaving, so the files have to be saved. Windows Server Backup creates complete backups that allow you to perform recoveries of your computer without needing to reference another backup. But before getting into creating Backup Let’s install the Windows Server Backup role.
Windows Server 2016 Backup Solutions
Install Windows Server Backup Role
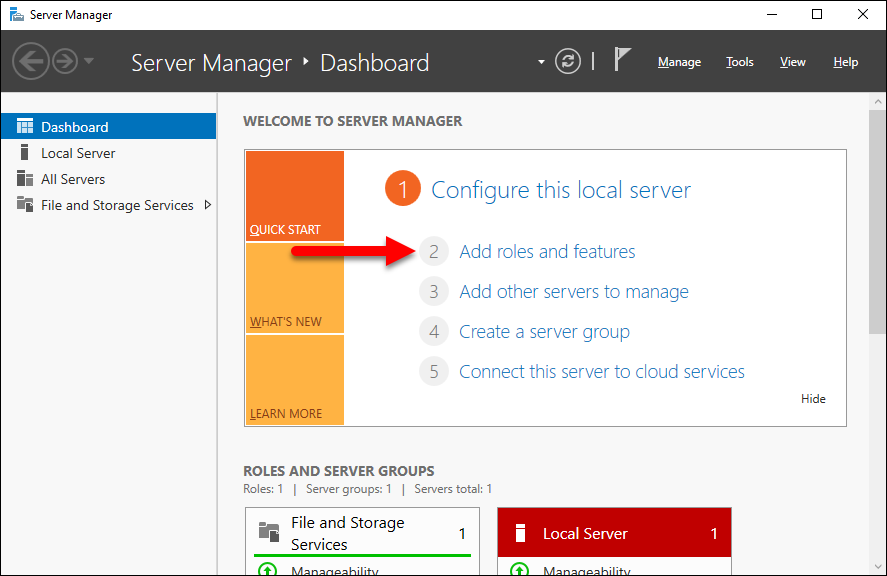
Step 1. Open Server Manager and select Add Roles and Features.
Step2. On before you begin Page click next.
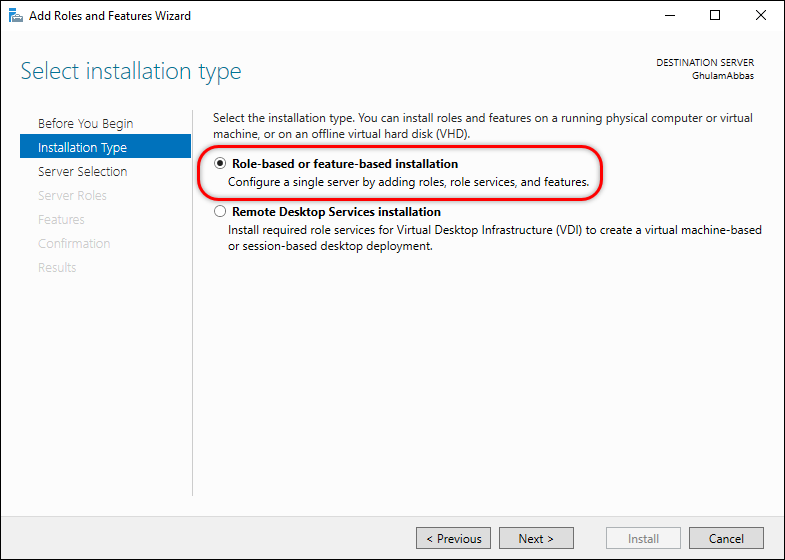
Step 3. Select the Installation Type and click next. For Now, I will select the Role Based or featured base installation.
Step 4. Select the Server Destination and click next.
Step 5. On the Server Roles Page select nothing and click next.
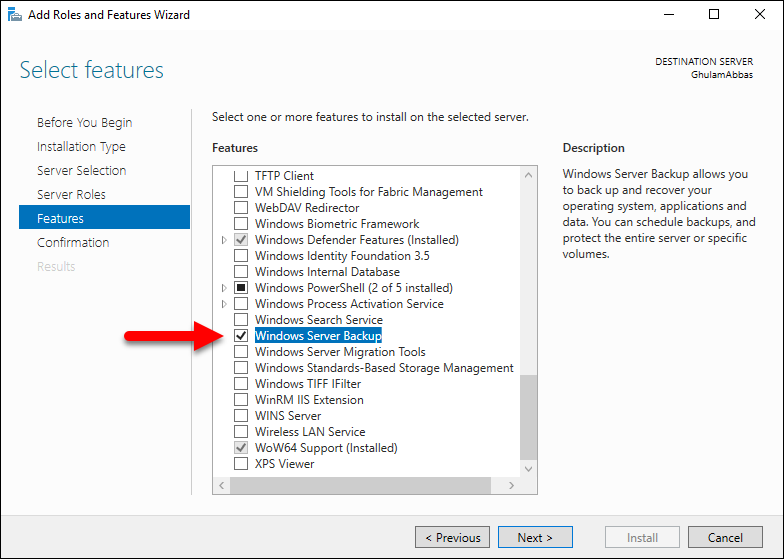
Step 6. On the features tab, select Windows Server Backup and click next.
Step 7. On the Confirm Installation page, select Restart the Destination Server Automatically if required and click Install. Then you have to wait till the Installation should complete.
Step 8. When the installation Completes, click Close to close the wizard.
Backing up the Server
Step 1. In order to Backup the Server, Open Server Manager, select Tools, and select Windows Server Backup. When the Windows Server Backup Wizard Opens, select Local Backup.
Step 2. On the right Pane which is Actions Pane, You can see:
- Backup Schedule.
- Backup Once.
- Recover.
- Configure Performance Settings.
Performing Backup Schedule
Step 1. To Perform a Backup Schedule, select Backup Schedule on the Pane at the right side of the Windows Server Backup.
Step 2. When the Backup schedule wizard opens, click next on the getting started Page.
Step 3. On the Backup Configuration Page, decide, you will do a full server Backup or a custom backup. For Now, I will select a Full Server Backup.
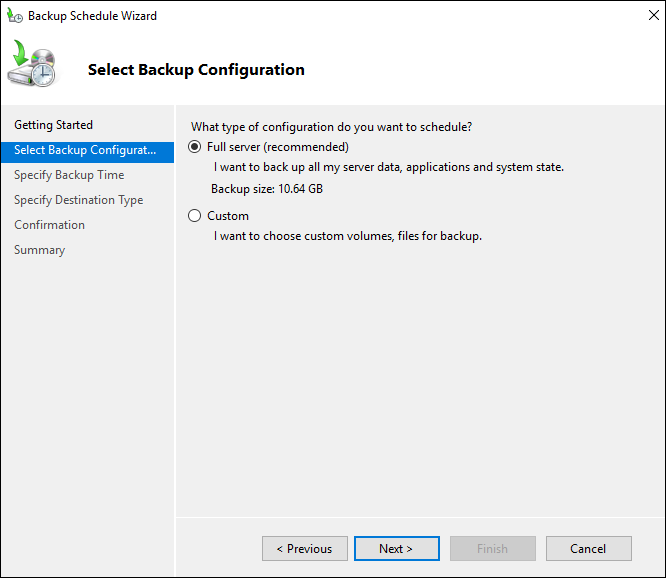
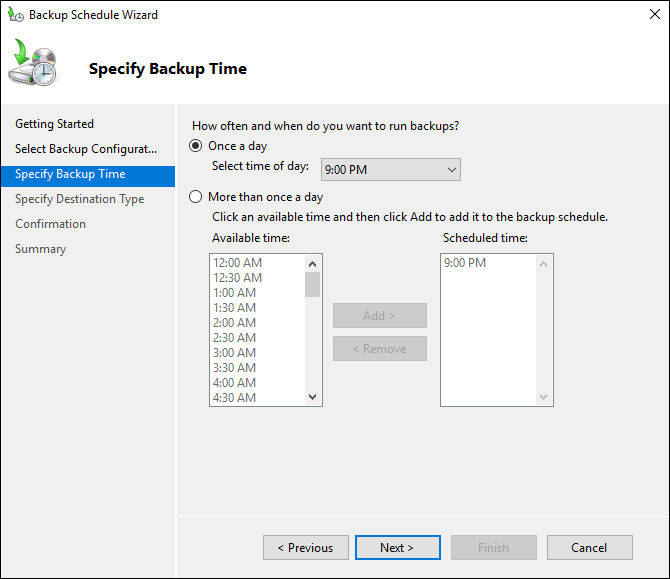
Step 4. Now you need to specify the Backup Time. I will set 9:00 PM Everyday you have to backup. When you specified the time click next.
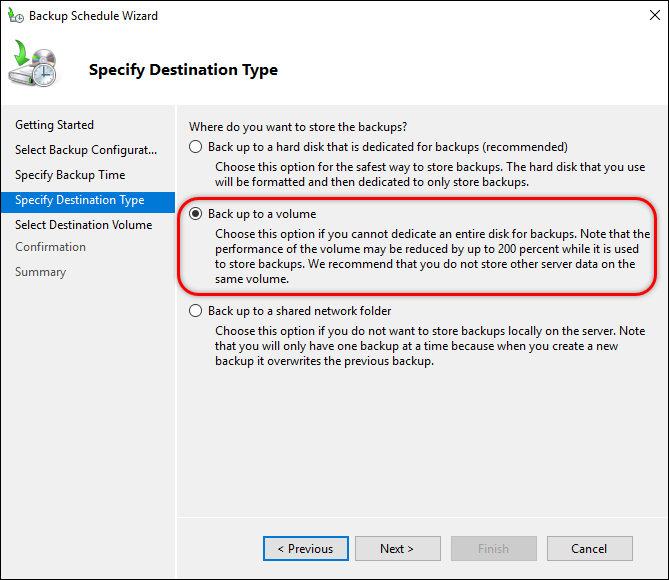
Step 5. Specify the Destination Type and click next. For Now, I will select Backup to a Volume.
Step 6. On the Server Destination Volume, select Add and add the Volume where you want the Backup should be saved.
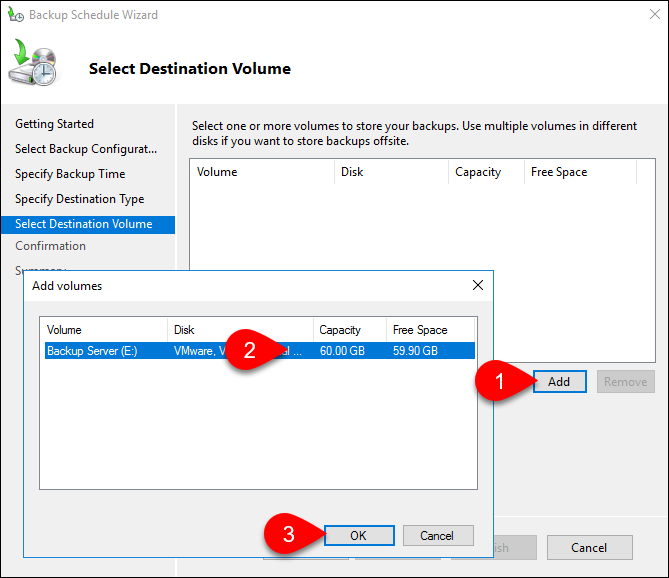
Step 7. When you are done, click next. And you will be on the confirmation Page. When you are done with the settings which you had been configured, click finish.
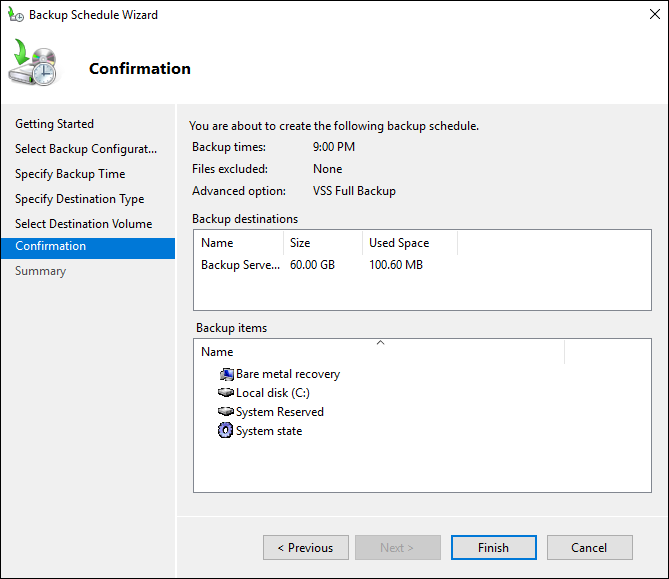
Step 8. Now the Backup has been scheduled and Currently, you are on the summary page. Go ahead click Close to close the Windows Server Backup Wizard.
Performing Once Backup
Step 1. To Perform a Once Backup, select Backup Schedule on the Pane at the right side of the Windows Server Backup. Basically, Backup Options are divided into 2 parts of:
- Schedule backup options
- Different Backup Options
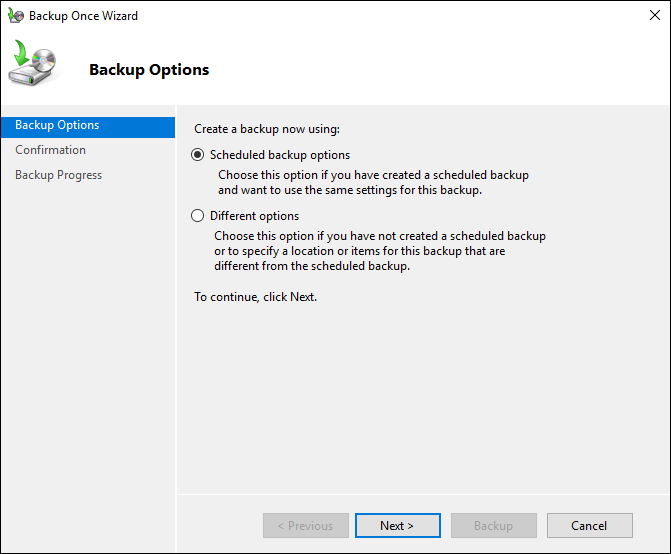
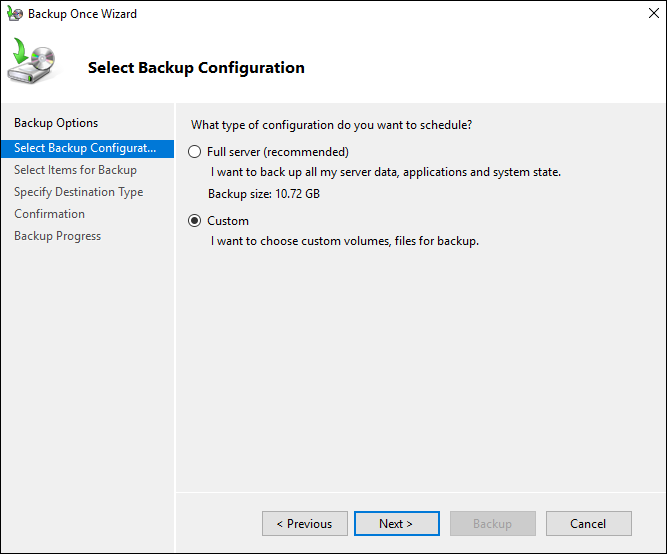
Step 2. For Now, I will select the Different Options and I will move on. This time Instead of full server backup I will select a custom backup.
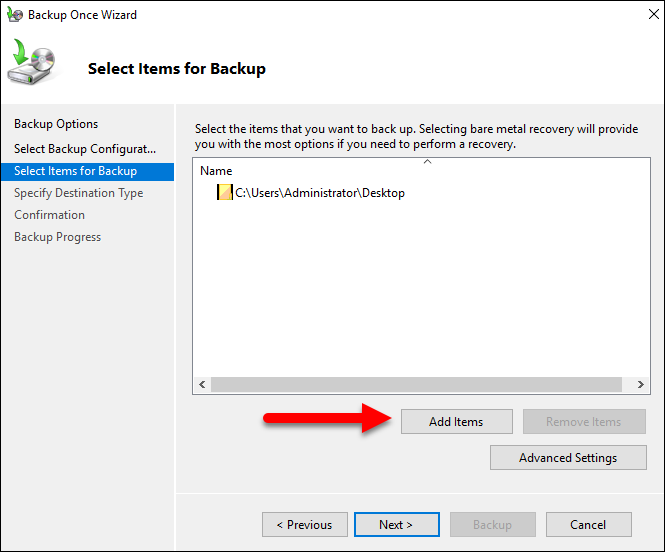
Step 3. On the select items for the Backup page, select add an item and add the items that should be backup.
Step 4. Now, you have to specify the destination type where the backup should be saved. As usual, I will select Local Drive.
Step 5. After you setup the destination type, now you are on the Confirmation Page when you are confirmed with all the settings click backup. Then You have to wait that the Backup Progress should complete.

Step 6. When the Backup completes click Close to close the Backup Wizard.
Summary
- Install Windows Backup Role From Server Manager.
- Open Windows Backup from Tools in the Server Manager.
- Go ahead and create a Backup of the Server.
That’s all, I hope this article helped you with Windows Server Backup Step-by-Step Guide for Windows Server 2016. If you liked this article, then please subscribe to our YouTube Channel for WordPress, Windows Server, the Internet and Business video tutorials. You can also find us on Twitter and Facebook.

