Microsoft word is such a robust application that there are a lot of features that you may not know about and also things that Word does itself automatically that you might want to change or disable. We’ll start with word advanced tips and tricks, moreover something for the application interface and we’ll also talk about the online Word which is a tool that you can use to work in MS Word from any internet connected computer. Next, we’ll look for some options for formatting text in the document. We’ll also see some options for maintaining copying and pasting, and we’ll finish with general tools, such as checking spell check dictionary or password locking a document, that will be very useful. There are tons of time-saving tricks, and we hope you’ll find them all useful.
In this article, we’ll be looking at both MAC, and Window versions are pretty much the same. So, let’s get started with Word 2016.
The start screen
By default, when you launch Microsoft Word 2016, the very first thing you see is the start screen or also known as a welcome screen or on Mac as the document gallery. It’s really handy for helping you choose a new blank document, an existing one or a new document from another template.
What if you prefer to start a new blank document every time you open Word. In that case, the start screen may be an extra necessary step that you want to skip. So, let’s see how can we disable the start screen.
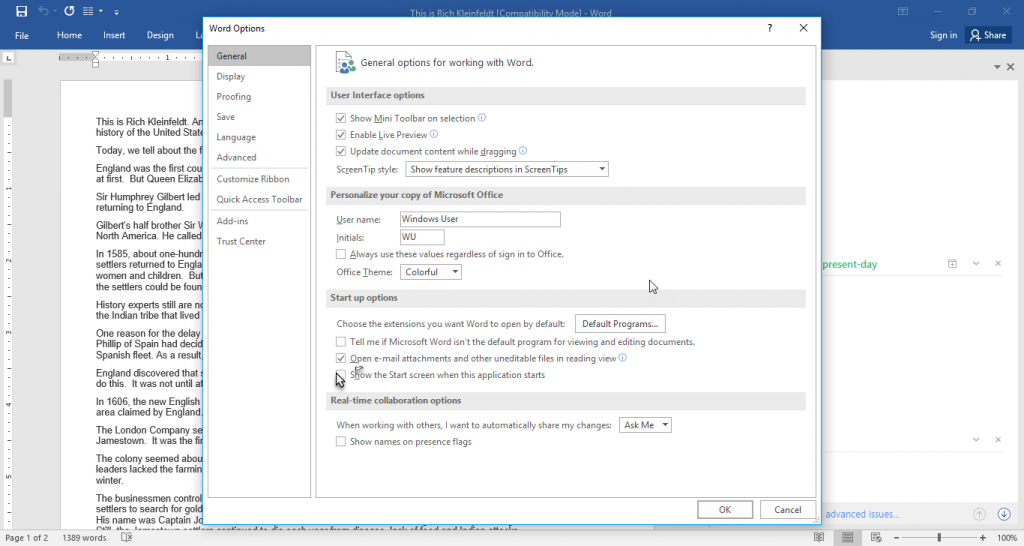
On Windows, we need to get to option panel. First, we’ll start with a document then choose File button up on the left. Then select the option and then the general category. Lastly, go down and unlock the option that says show the start screen when this application starts and hit OK.
And on Mac too, after launching Word, the very first thing you’ll see is the document gallery. To disable that, go to the main Word menu, preference and then general category and only disable the option ‘’show word document gallery when opening’’. Now, if you launch word, you’ll directly be taken to the blank document.
Set a default font for new documents
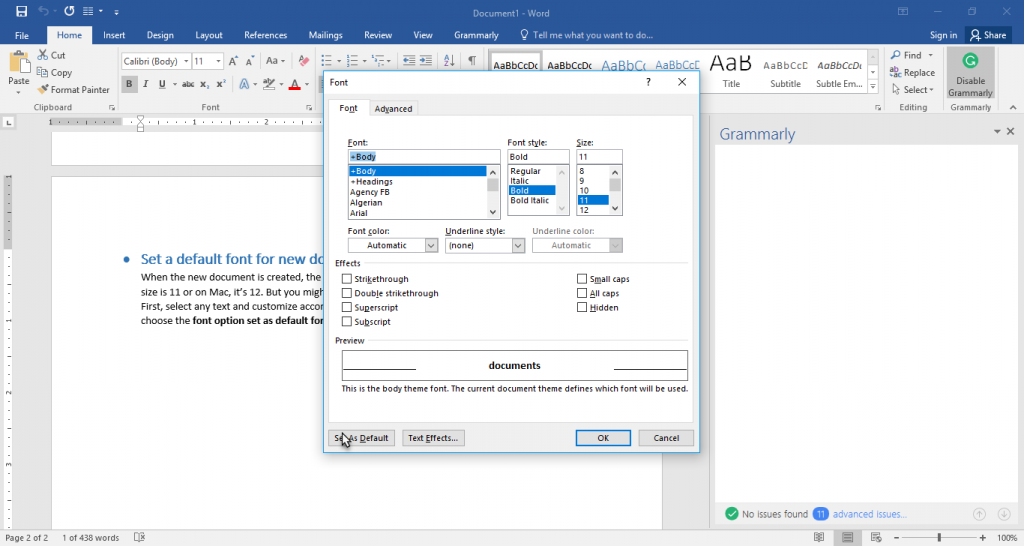
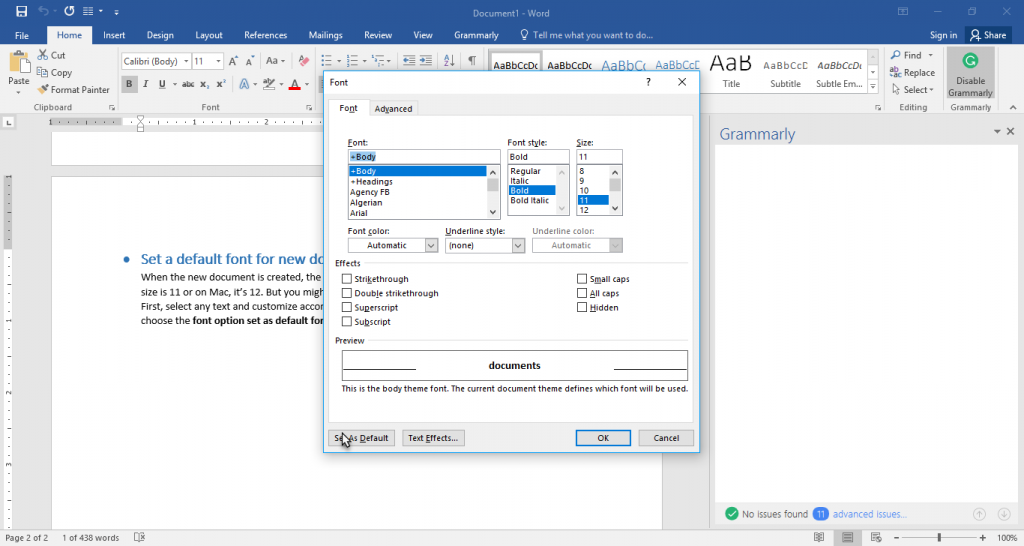
When the new document is created, the style by default is normal, the font is Calibri, and the font size is 11, or on Mac, it’s 12. But you might want to prefer a different font. Well, it’s easy to do so. First, select any text and customize according to your preference. Then right click on the text and choose the font option set as default for all the documents.
Use Word online
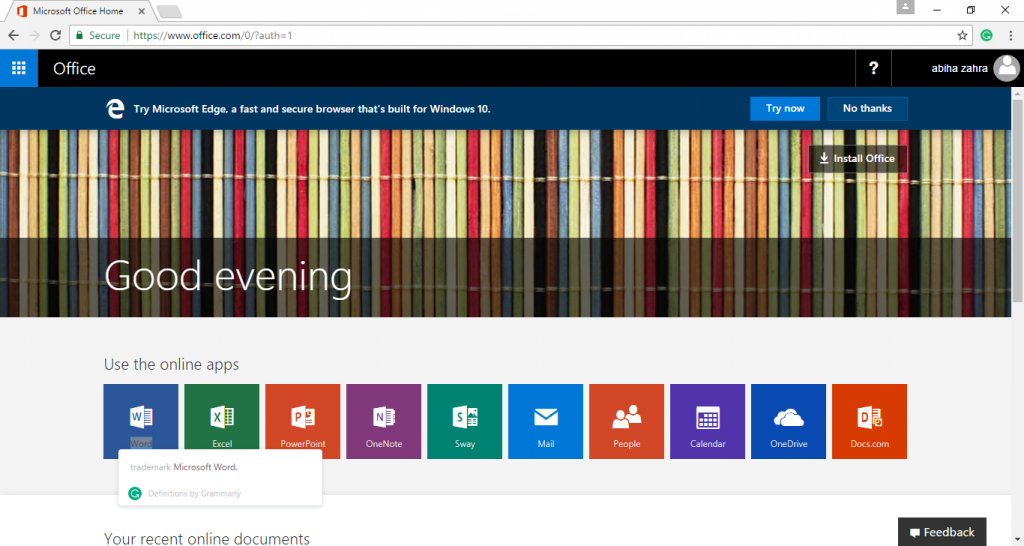
To use, Ms. Word online you need to have an internet connected device. Open up a web browser, and go to this address office.microsoft.com. Now, to use Word online, you need to have a Microsoft 365 account. If you have an account, sign in, and if not, create an account. After you sign in, you’ll be taken to your Microsoft account, and here you can choose which online application you want to use; an excel online, word online, powerpoint online, or any other. As you got to your document, you can’t edit until you hit the option edit document.
Run updates
Microsoft has been updating since the original release. To stay up to date on Windows, you can install updates from within the application, or you can have windows install the applications automatically.
On windows, after opening the new blank document, choose File and then account where there is an option for updates. If you click on that, it opens up a menu where there is an option update now if you click on it will start downloading the updates. There is also another option disable updates if u choose this one you’ll disable updates for Word.
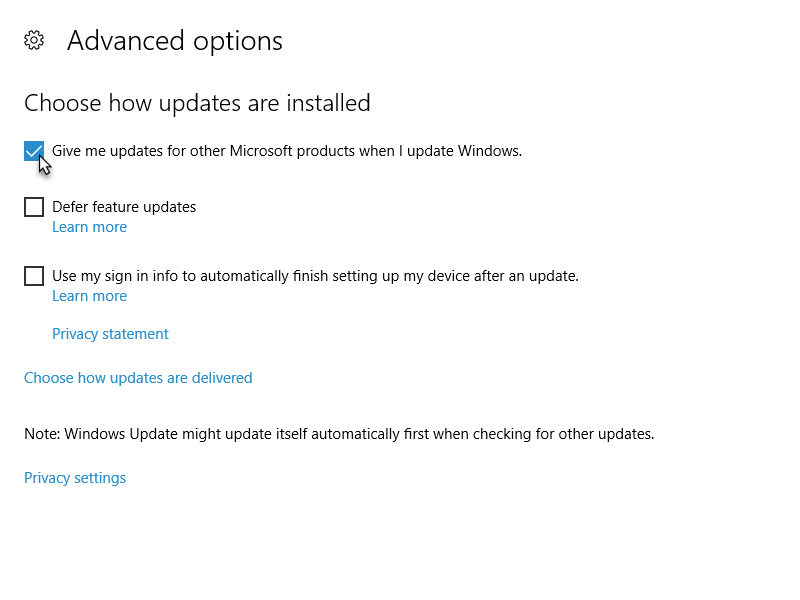
You can also look at the global updates to customize updates. Go to settings, then to update and security, and then hit advanced options where you’ll have to choose to install updates automatically. Finally, choose the option that says give me updates for other Microsoft when I update window.
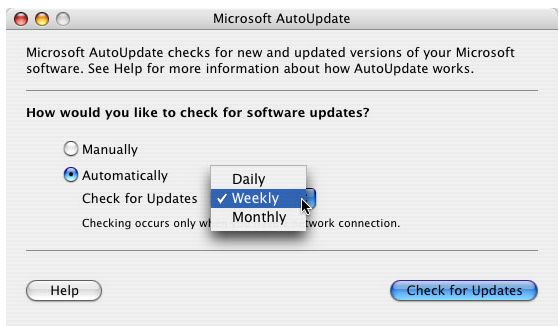
On Mac, after launching Word, go to the Help menu and click on check for an update that will open you a menu where you can choose to install the update automatically.
Default save location
When you save a document, you need to choose a platform. To set your own default location; go to File and choose the option. In the save category, there is a default local file location where you need to browse and set your own location and hit OK.
You can also change the default file format by going to file and choosing the option. In saving category the first option is for the file format. Select your own preference and hit OK.
Whereas on Mac, you don’t need to set your default file location because it remembers the last location.
Quick part gallery
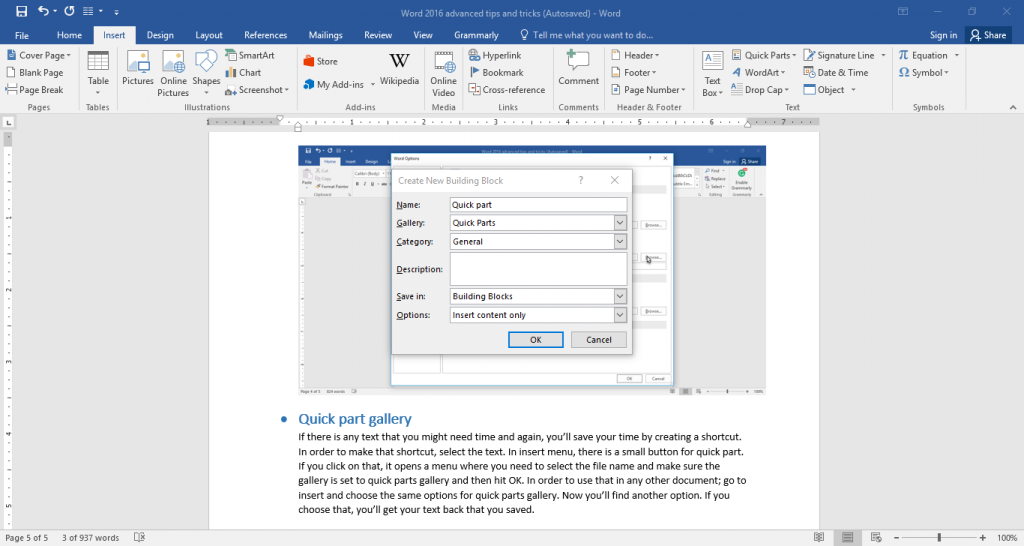
If there is any text that you might need time and again, you’ll save your time by creating a shortcut. To make that shortcut, select the text. In insert menu, there is a small button for the quick part. If you click on that, it opens a menu where you need to select the file name and make sure the gallery is set to quick parts gallery and then hit OK. To use that in any other document; go to insert and choose the same options for quick parts gallery. Now you’ll find another option. If you choose that, you’ll get your text back that you saved.
