The core of the Windows Domain System is the Domain Controller which response to security authentication requests such as logging in, checking permissions, etc. The domain controllers for each domain replicate their data among themselves for fault tolerance and load balancing purposes.
But sometimes You may forget the password of the Server or the server may catch fire, that time exactly you need a second Domain for the Server, that’s why you need an existing Domain Controller.
In order to install an Existing Domain Controller, first, you have to install Active Directory on the Server then follow these procedures.
Install-Uninstall Existing Domain Controller on Server 2016
Install Existing Domain Controller on Server 2016
Step 1. Install Active Directory Domain Services on the Server, which you want to configure that as a second Domain Controller.
Step 2. Select ADDS, on Server Manager, the select more.
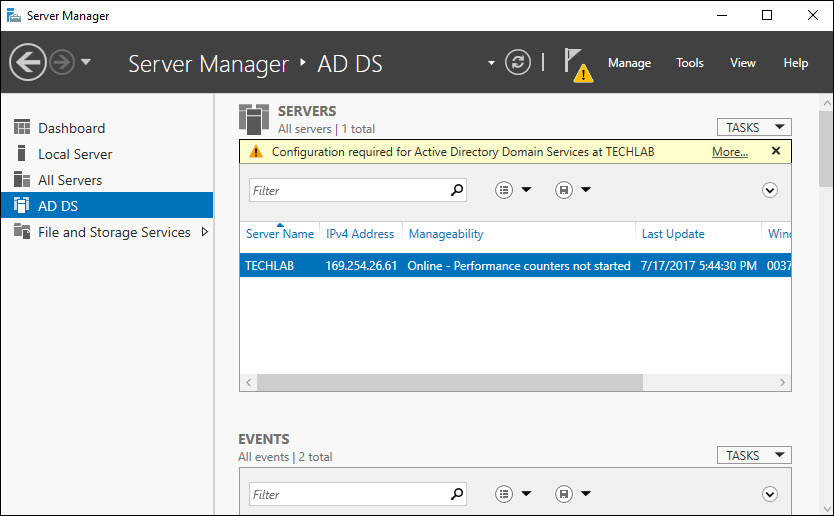
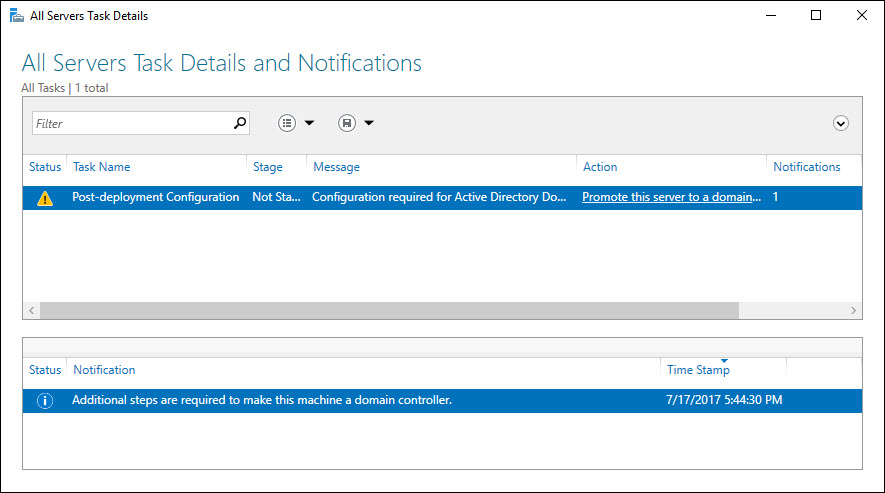
Step 3. Select Promote this server to a Domain on the All Server Task Details.
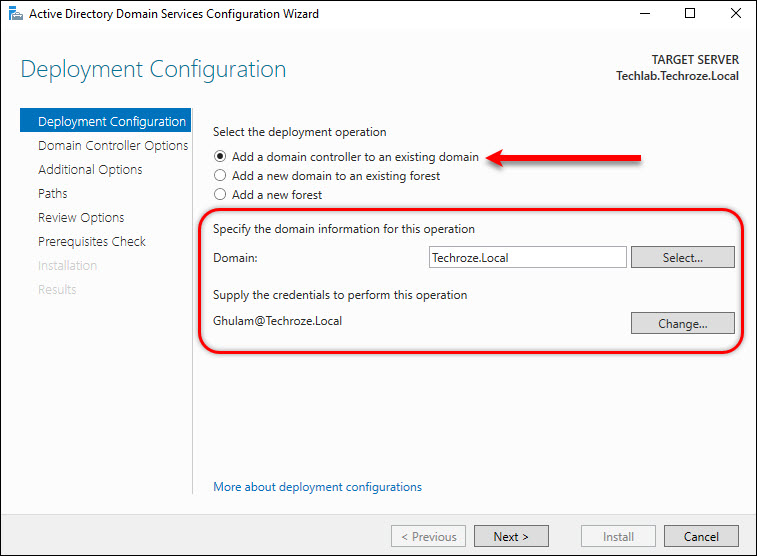
Step 4. Now you are in the Deployment configuration page. Type the Domain, then type a user credential which has access to the real Domain Controller.
Note: There are three options for the Configuration.
- Add an existing Domain which I will cover in this article.
- Add a new Domain to an Existing forest.
- And the third will be creating a new forest. I have already created its article; I recommend you to visit the article.
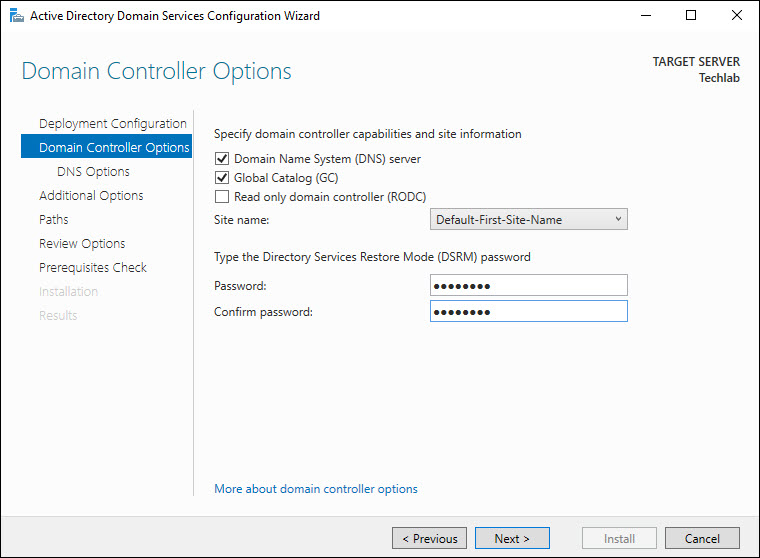
Step 5. In the Domain controller page, between three options 2 of them that will be configured as Default, but this depends on you, you can uncheck it.
If You want to create a Read only Domain controller, select the Read-only Domain Controller (RODC).
Down there, there an apart for active directory restore mode password, insert that and click next.
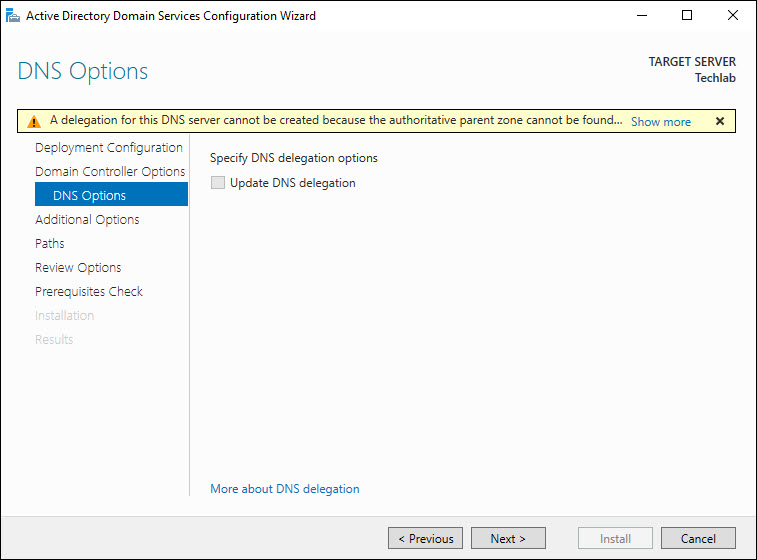
Step 6. On the DNS option page, click Next.
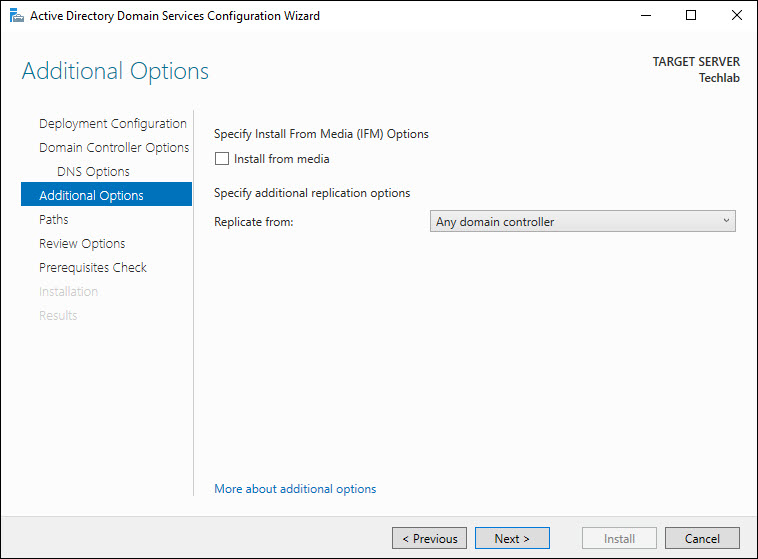
Step 7. In the additional page there are two things:
- Install from Media (IFM).
- Specify the Additional replication option.
Install from Media (IFM):
IFM is an option which can be performed without the internet connection. Instead, you can use the USB or an HDD. After that, you copy all the NTDS.dit’s information through a cmdlet to the USB, then on the second server you will perform till here, and you will Install from Media, and you will browse for the file.
Specify the Additional replication option:
Replicating option requires an internet connection through a (Wide Area Network) WAN or a (Local Area Network) LAN. Don’t worry here I will Perform that with the step by step Guide.
If you are with me with the Replication option, click Next.
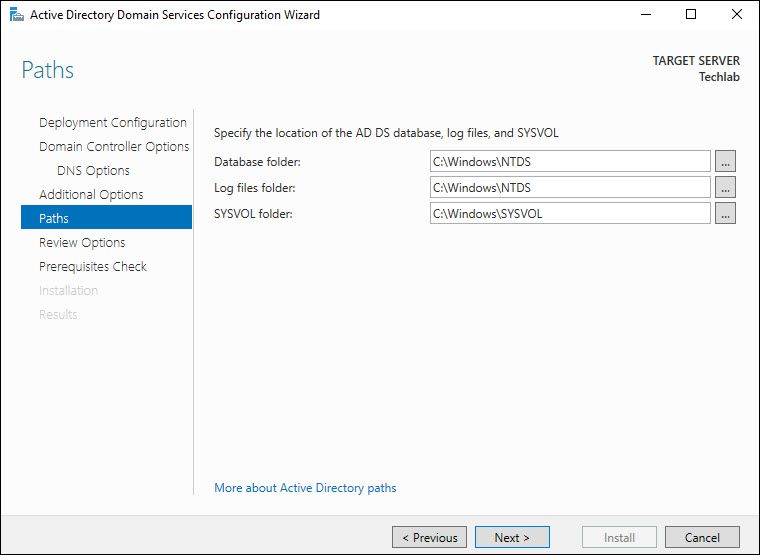
Step 8. By Default, the NTDS.dit or the Active Directory’s Information will be stored on the default Places specified by the Server. If you desire, you can change that.
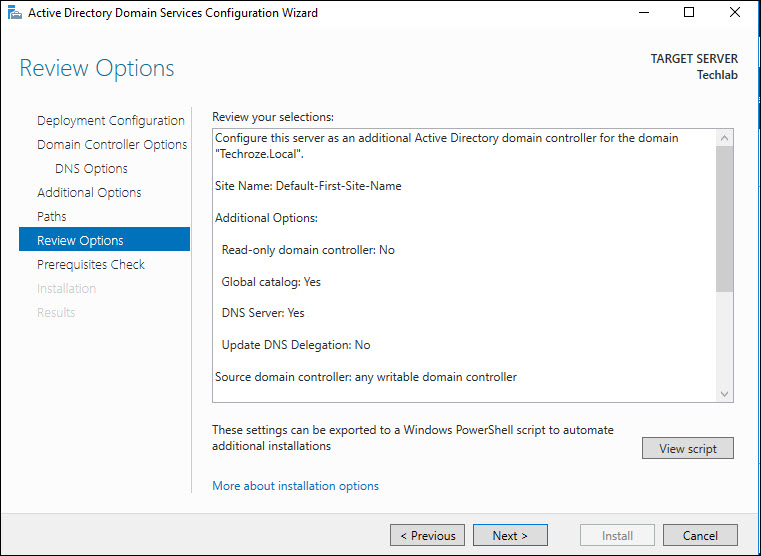
Step 9. Now you have to review the Options or the settings which you have applied when you are fine click next.
Step 10. After that, the server will check the prerequisites for the feature. When the server is done with requisites, click next.
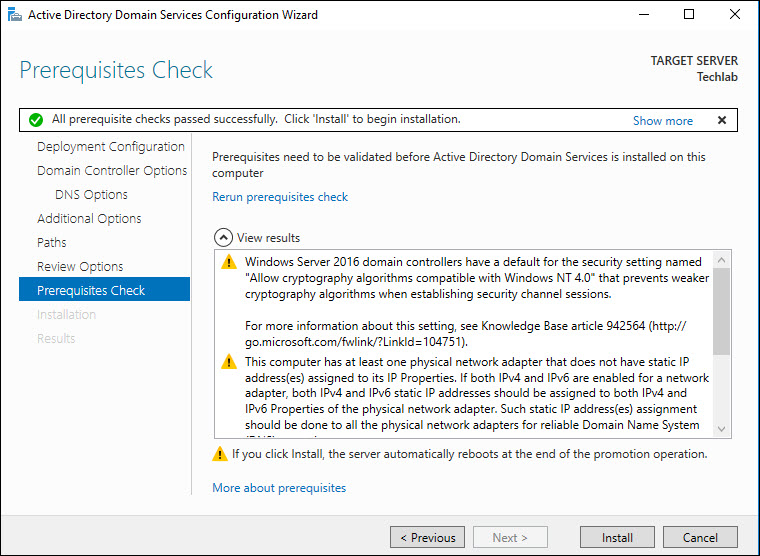
Step 11. Now you are ready to install the Active Directory feature as an existing Domain. Select Install and wait until it restarts the server.
Step 12. After Installation, you will have exact access and the Domain Controller, because you are the second Domain Controller.
Uninstall Existing Domain Controller
Step 1. Open Server Manager.
Step 2. Select Add roles and features.
Step 3. On the Add Roles and Features, select start the removal wizard.
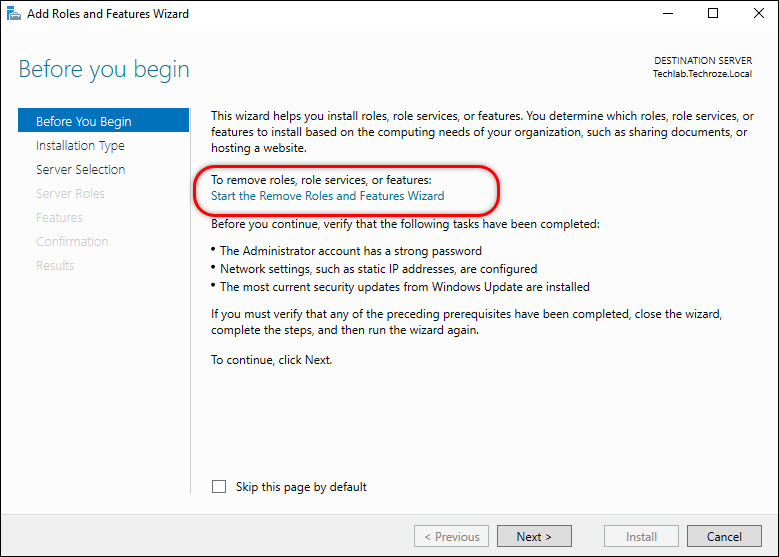
Step 4. Now you are on the Before you begin page of the uninstalling a feature or role. Click next to continue.
Step 5. Select the Server Destination and click next.
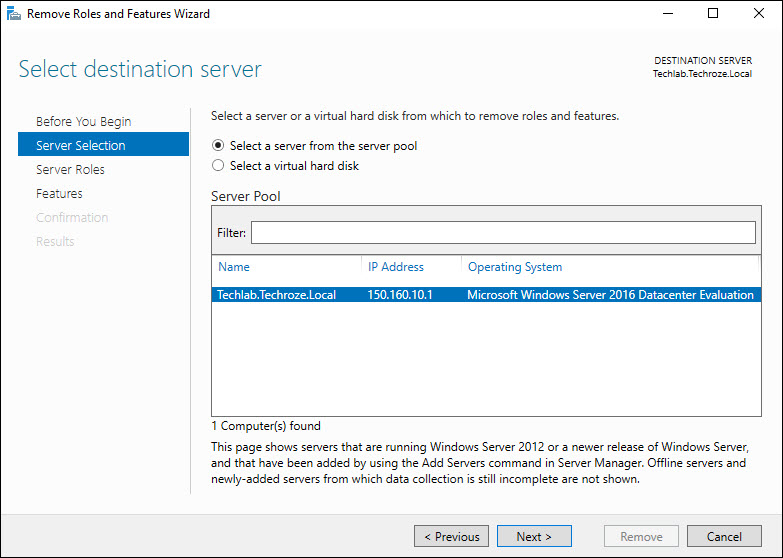
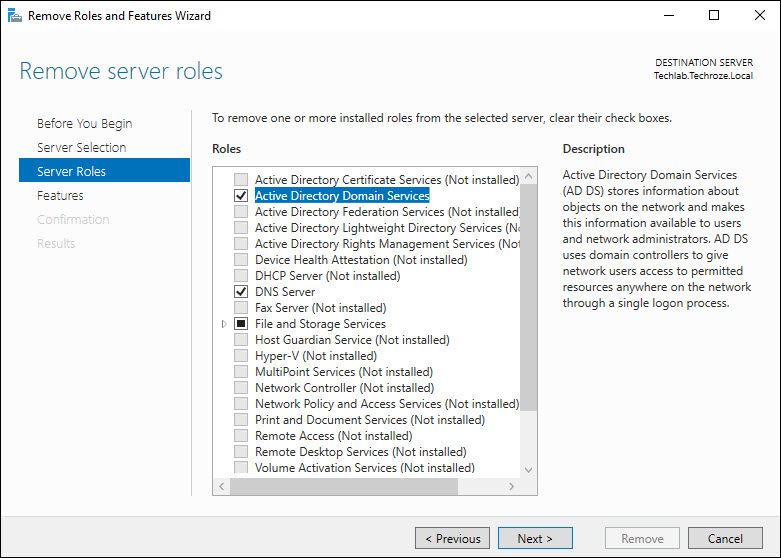
Step 6. Select the role or the roles which you want to remove. In this case, I will select Active Directory Domain Services.
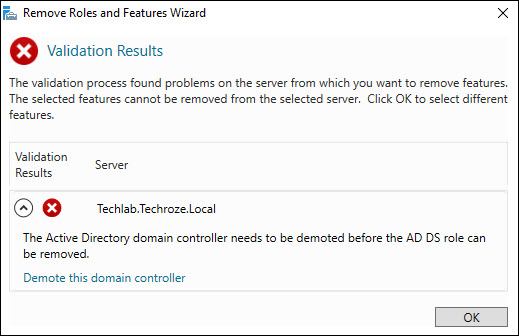
After that a popup window will open, you have to select remove features, then you will be asked to Demote the Server, so simply select Demote and you will be back on the server roles page.
Now that you have selected the role, click Next.
Step 7. If you also want to remove any feature, just select them and click next. By default, the Group Policy management feature will also be removed, because they are apart administrating and while installing ADDS, group policy will be installed without checking them manually.
When you are done with features, click next.
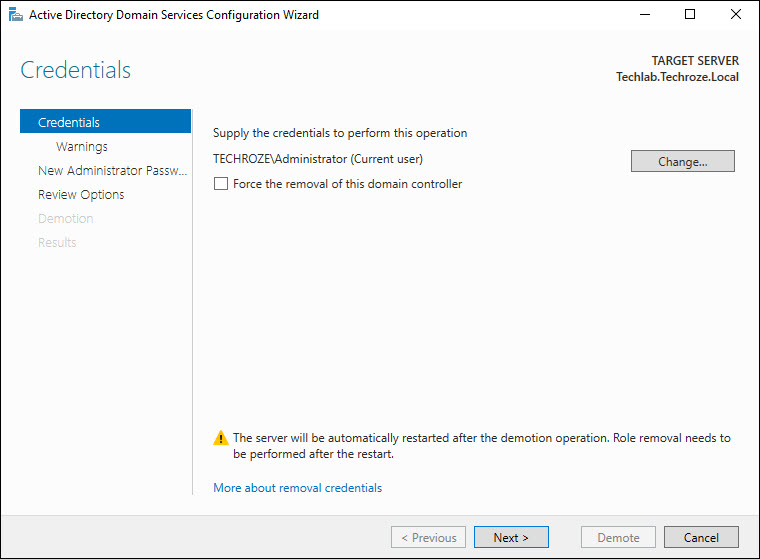
Step 8. Now you are on the credential page. There is an option Force the removal of this domain controller, usually, we used on the labs, here is an example:
The original Domain Controller, which has the record of both the Domain Controllers, If the server is offline, or it caught fire, or simply we don’t have it anymore.
On that time the uninstallation would never be complete on the second server, that time we will select Force the removal of this domain controller even it does not have a connection with the first server.
When you are done with the credentials, click Next.
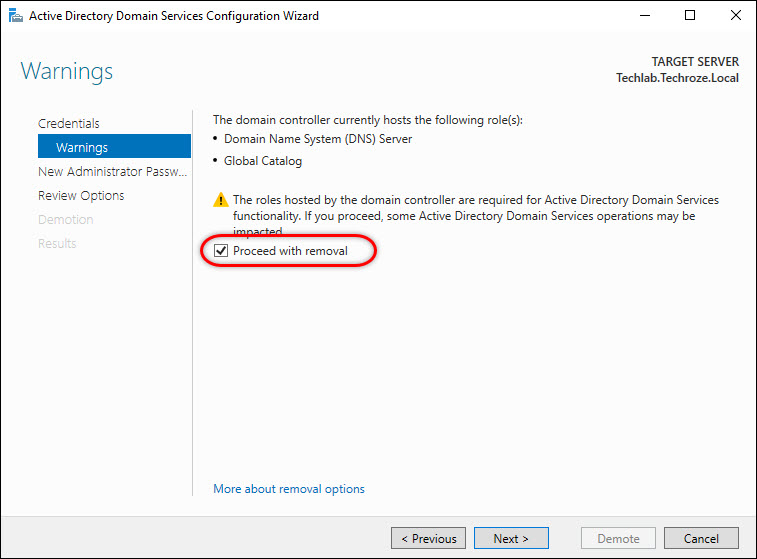
Step 9. Now you have to the check the Proceed the removal checkbox.
The good thing this part is, it tells you that we won’t remove the DNS and the Global Catalog.
When you are done with the checkbox of removal, click next.
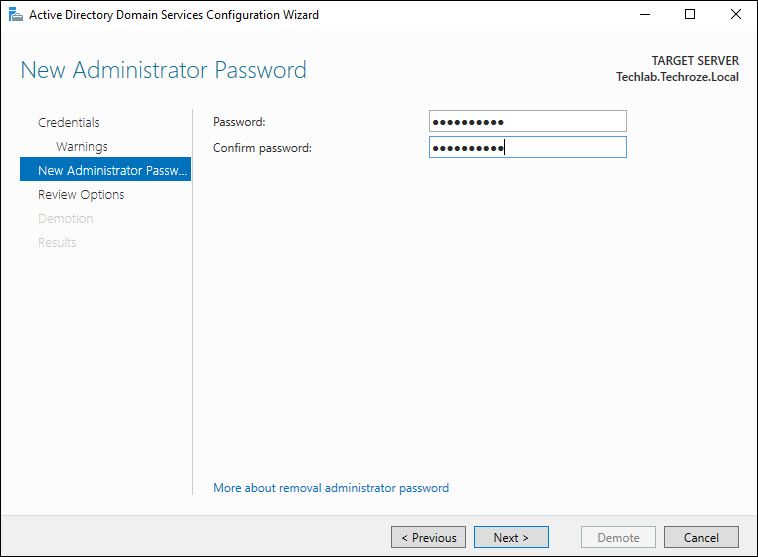
Step 9. Now you have to type the new Administrator Password for the server. When you are done click next.
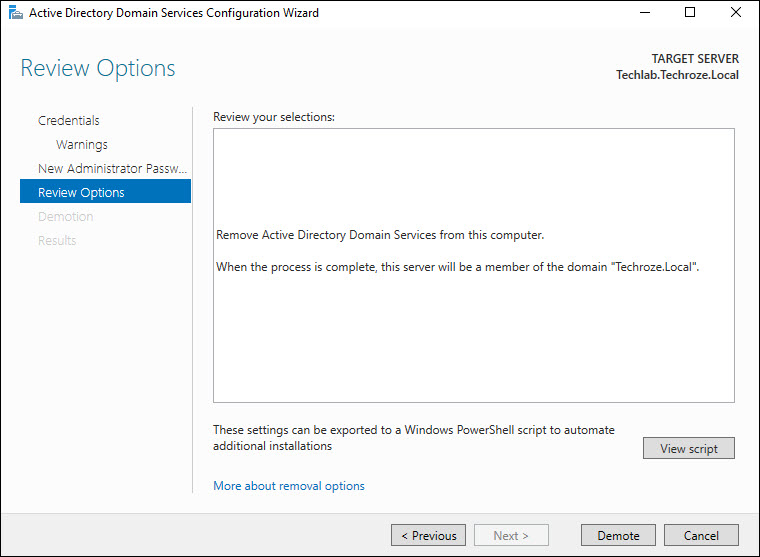
Step 10. Review the settings which you have made. when you are done click Demote. Then you have to wait for some seconds until the demotion process completes.
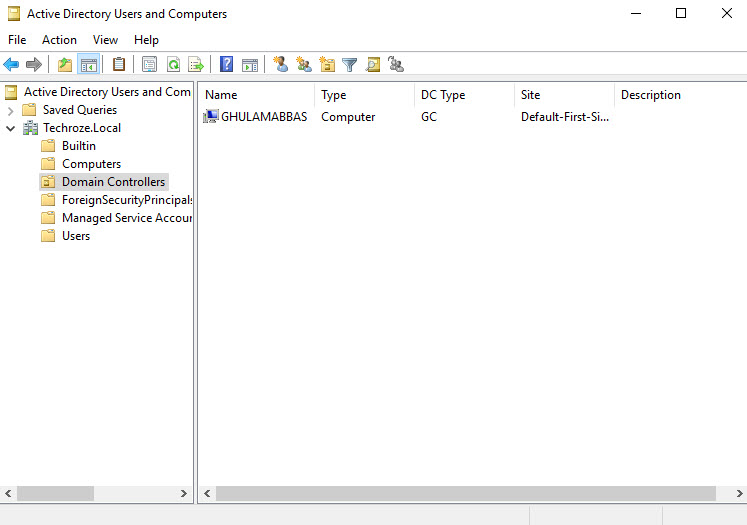
Step 11. After Demotion, the server will restart. After the restart, you will on the Active Directory Users and Computers, you are no longer a part of the Domain Controller.
That’s all, I hope this article helped with How to install-Uninstall Existing Domain Controller on Windows Server 2016. If you liked this article, then please subscribe to our YouTube Channel for WordPress, Windows Server, the Internet and Business video tutorials. You can also find us on Twitter and Facebook.

